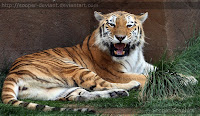
In this tutorial, you will learn how to add a unique effect to your photos to make them come alive. We will be looking at creating a cutout of an object or person in a photo to create the illusion that they are emerging from the photograph. In this example, we will be using the following image:

Our first step will be to cut out part of the background. PhotoShop makes this relatively easy for us, particularly when we have a background which contrasts the foreground. You can use any of PhotoShops' built-in selection tools or the extract tool for this. We will use the Quick Select Tool to make a selection like so:

We can then tidy up the selection with the Rectangular Marquee tool by making the left edge a hard one, like so:

With the selection, we will only have the runner's arm and leg outside of the photo. Now hit the Delete key to erase our background selection. Then press Shift+Ctrl+I to Invert Selection, or goto Select > Inverse:

Now we have the opposite selected, we want to tidy it up again and not select the arm and leg that are outside the photo. Use the Rectangular Marquee tool again, holding Alt to subtract from Selection, to achieve this:

Now choose White as your foreground color and create a new Layer (Layer > New > Layer).
Goto Edit > Fill, and fill the selection with White. This will fill our selection with White on the New Layer, which should now be in front of our original layer. Re-order them so that the White is beneath your photo layer.
Next, press Ctrl+D to deselect and you want to make sure both layers are selected in the Layer panel (Shift-click both Layers). Once they are both highlighted in the Layers panel, which means they are both selected, goto Edit > Transform > Perspective, and adjust your image a little like this:

Next, right-click your image and choose Rotate (or goto Edit > Transform > Rotate), and rotate it a little, like so:

Now right-click and choose Scale (or goto Edit > Transform > Scale), and reduce the size so that it fits nicely inside the composition again:

All of these steps should have been done with both layers selected, so transformations should have been applied to both layers.
Now select your blank White Layer, and Ctrl-click it to make a selection:

Now goto Select > Modify > Expand, by 5 pixels. You may notice that the selection has rounded corners, due to our transformations and expansion. If you prefer, you can zoom in and fix these manually with the Polygonal Lasso tool:

Again, goto Edit > Fill to fill the new selection with White on the same layer. We should now have a nice border that gives us a photograph effect:

We can now add a background to add to the effect, and do whatever else you please:

thanks to :
Photoshop Atoms

 3. make the first layer(Layer 1 copy) invisible by clicking "eye symbol"
 6. Select Layer 1 layer.
 9. Go to Layer > New Adjustment Layer > Brightness/Contrast . You may adjust until your eyes comfortable. (eg: Brightness : 37 , Contrast : 5 )
 Thanks to :best-photoshop-tutorials


 click to zoom


